How to Use the New Feature of Generative Fill AI in Photoshop
Generative Fill AI in Photoshop is an amazing feature that uses Artificial intelligence to add or delete content in the images. Read this article to explore what Photoshop’s Generative Fill AI is and its step-by-step guide for complete knowledge. So, let's learn and discover your inner imagination.
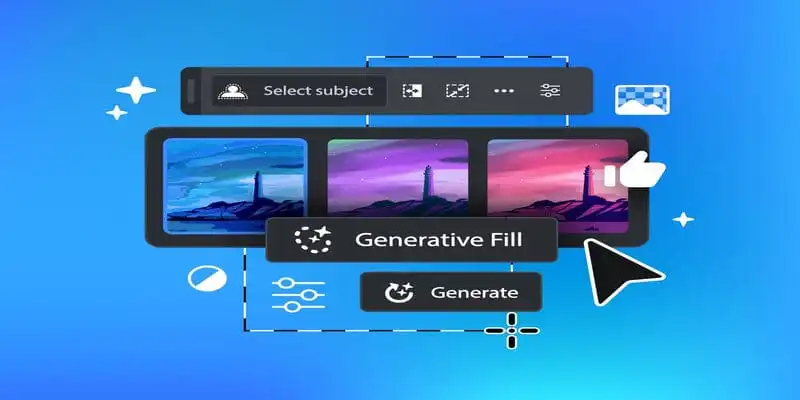
In today’s tech-based world, multiple revolutionary findings are being discovered. After ChatGPT, the power of AI is now seeping into the world of images. Therefore, Adobe is now rolling out a new beta image-generating feature called Generative Fill AI in Photoshop. This is one of Adobe's fresh moves in the AI contest. Generative Fill AI enables the users to quickly add, delete, and expand the material with a single text prompt. This amazing feature is powered by AI that is not machine learning. Machine learning algorithms can create astonishing images while keeping in view the exact pixels and lighting perspectives.
If we consider the statistical perspective of Generative AI in the market, then around 44% of marketers in the U.S. are using Generative AI for content creation. Apart from that, 39% of users use this AI for making social media images, so the remarkable feature of Generative Fill AI in Photoshop gives users a chance to make and modify the image at any moment. Therefore, to know exactly how to use this wonderful AI feature in Photoshop, you have to stick with this blog for a complete understanding of its use. So, let's get started with the world of Photoshop image generation through AI.
Understanding What Generative Fill AI in Photoshop Exactly is
In simpler terms, if you are a picture editing enthusiast and you want to do certain things like:
- Do you want to add any object in the image for quick transformation?
- Want to edit the background of a certain photo?
- Want to remove something from existing snapshots?
- Or want to magnify the background of your picture.
If yes, then this tool is designed for you. Generative Fill AI in Photoshop is one of the revolutionary moves in Adobe Firefly's generative capabilities. This inauguration aims to explore your inner creativity by enabling you to modify the image as per the user’s choice with just text prompts.
 ThinkML Team
So this amazing feature is there for you to convert the tedious game of photo editing into more fun and delight. Moreover, Generative Fill powered by Adobe Firefly promises to make designs for commercial use as well. By keeping in mind that Adobe Photoshop stocks 100s of millions of professional images that are known for the best quality in the market, you can harness the power of the AI capabilities of Photoshop to take your snapshot to the next level, even exceeding your own beliefs.
Requirement Alerts for Using Generative Fill AI in Photoshop:
Before diving into the steps of using Generative Fill AI in Photoshop. Let yourself know first the basic requirements to proceed with this tool.
- You must have a Paid Adobe Photoshop subscription. It is one of the biggest and essential conditions of using the Generative Fill AI tool.
- Always make sure your date of birth is correct while creating an account because the generative Fill AI tool is not supportable for those less than 18 years old, even if you have paid Photoshop.
- Only English prompts are acceptable right now.
Now, let's dive into the step-by-step guide to using Photoshop's Generative Fill AI tool.
Step-By-Step Guide of How to Use Generative Fill AI Tool in Photoshop
Note
Only Photoshop beta offers the option of Generative Fill. If you want Photoshop beta, then first of all, you have to have an Adobe Photoshop subscription.
Apart from that, if you only want to check out this new feature for basic exploration, then the Photoshop beta also gives a 7-day free trial. But for that free trial, you must download Adobe Creative Cloud.
Now, here is a step-by-step guide for this entire process:
Step 1:
(Download Adobe Creative Cloud App and Sign up for Photoshop Beta)
First on first, if you have a paid Adobe subscription, then you don't need to download Creative Cloud. Just sign up for Photoshop beta and enjoy the beta features. But if you don’t want to pay the subscription and want to try the beta version of Photoshop, then follow these points.
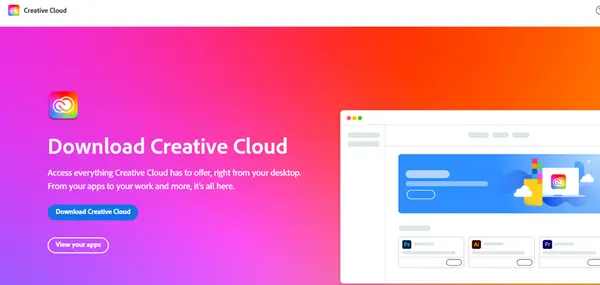
1.1. Download Adobe Creative Cloud on your desktop.
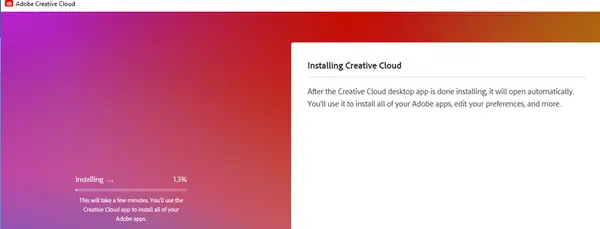
1.2. After downloading, the installation process will start. This installation process will take a few minutes.
1.3. After installation is completed, this kind of interface will be shown on your desktop.
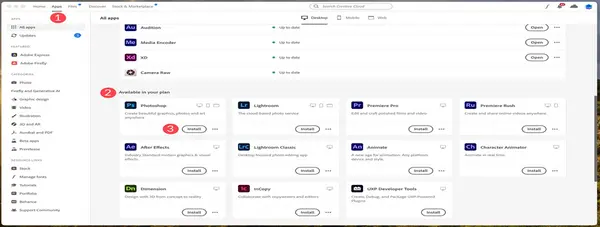
1.4. By scrolling down in the interface, you will see the beta Apps option.
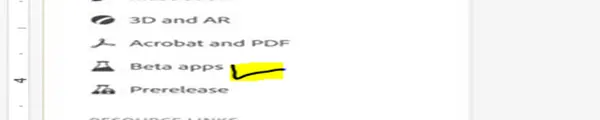
1.5. By clicking beta apps, you will see various options. From there, you will see the Photoshop beta option as well. Click on the install command.
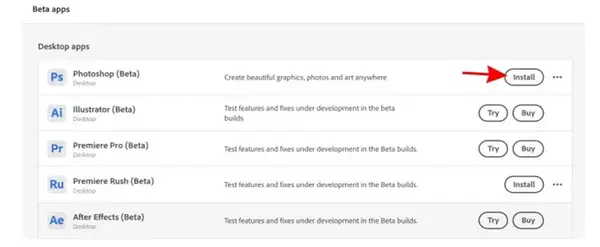
1.6. After clicking, the Photoshop beta will be installed, and you will see the Generative Fill option. Click on the Try Now button.
That’s it from 1st initial steps. Now, you are at the point of using the Generative Fill AI feature in Photoshop.
Step 2:
(Use Generative Fill AI Tool in Photoshop Beta)
Once you have enabled the generative fill AI feature, it's time to explore this tool.
If you want to see extravagant results of modification from the tool Generative fill AI in Photoshop, then make sure to use that image, which has a great margin of expansion.
For this, let's follow the steps;
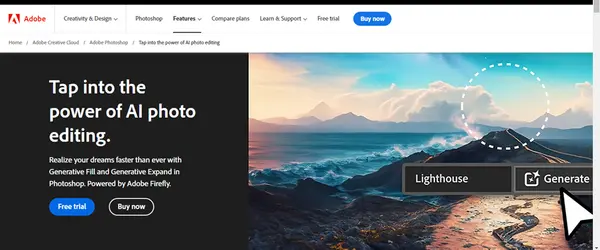
2.1. Pick the image that you want to edit with Photoshop’s Generative Fill AI. The example you can see below in the screenshot;
In this image, you can see the contextual taskbar, which has the option of Generative fill. You can clearly perceive the selected lantern that the user might want to delete.
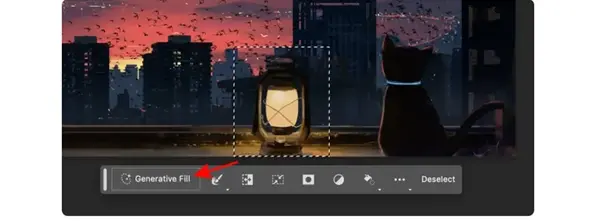
2.2. To edit your desired area of the image, use any selection tool, such as the rectangular select tool. Select the particular area of the image. Now, after selection, you will see the Generative Fill command button. Just click on it. In the image above, you can see the contextual taskbar, which has the option of Generative fill. You can clearly perceive the selected lantern that the user might want to delete.
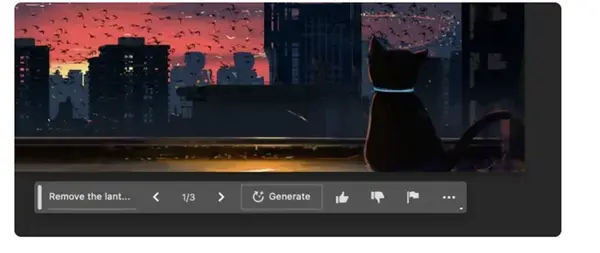
2.3. After that, a prompt box will open for you. Here, you will type your requirements and then click on the Generate button. In this way, you can add or delete anything from the image. Additionally, you can also keep this box empty to let AI itself make changes for you.

2.4. Now, you have to wait for a few minutes for the finishing process. The software will give its answer depending on the complexity of the prompt. If the request is complex, then AI will likely take time from a few seconds to even minutes. So be patient and hold on.
For example, in the screenshot below, you can see that how nicely it removes the lantern from the image and gives a seamless effect.
2.5. That's it. Now you can make any changes according to your choices. In this way, you can explore the feature of Generative Fill AI in Photoshop. You can do multiple things while modifying the image. For example, if you want to enlarge the canvas, then you can go into Photoshop's canvas size item menu to broaden it.
So, follow these simple yet easy steps, to begin with your first imaginative art.
ThinkML Team
Final Thoughts
Adobe’s new Generative Fill AI feature is a great attempt in terms of AI image production and modification. So, we have to embrace this innovation in terms of opening up new possibilities for the users. Moreover, with a clear understanding of this AI and its step-by-step guide, users can utilize the power of this amazing AI tool to enhance their photo editing experience. Therefore, we have to appreciate the evolution of technology like Photoshop's Generative Fill AI tool because this kind of innovation helps users to experiment and uplift their creativity with a transformative perspective.
Frequently Asked Questions/ Related FAQs:
Q: Is Generative Fill AI Tool Free to Use?
No, it's not free to use. You have to buy an Adobe Photoshop subscription in order to use this tool. Moreover, with Photoshop beta's 7-day free trial, you can use this tool for only 7 days. After that, a subscription will be the ultimate requirement.
Q: What can Generative Fill AI in Photoshop do For Your Image?
Photoshop’s generative fill AI tool can do wonders for you with the selection command. With your single text prompt, it can generate a new background for your image. Secondly, it can also generate objects in your picture if you want. Thirdly, this tool can expand your image while making selections for the empty region. Lastly, it can also remove objects and many other variations.
Q: How do we Access Generative Fill AI in Photoshop?
To access Photoshop’s generative fill AI, just select the area you want to fill and then go to the edit menu option to choose "Fill," and then select "Generate." By doing so, you can use AI for smart content generation.
Q: Does Photoshop’s Generative Fill AI Support Customization Options?
Well, Generative Fill AI largely automates the content generation process, and Photoshop provides some customization options such as scale, rotation, and transparency to fine-tune the content according to the preferences.
Q: Are there any limitations to Using Generative Fill AI?
It’s obvious that Generative Fill AI works very well in image modification, but it may only sometimes produce perfect results according to your choices due to the complexity of images. It's advisable to edit the content manually as well to ensure the desired outcome.